What’s a Lookup View Anyway?
Ever noticed the magnifying glass icon in Sage 100? Click it, and you’re taken to a lookup screen. This is where you can search for all sorts of data, from vendor details to account numbers. It’s meant to be a speedy gateway to your data.
Finding the data you need in your Sage 100 system shouldn’t be like searching for a needle in a haystack. It should be quick and easy! Yet sometimes, the standard lookup screens just don’t cut it. They might not show you exactly what you need, or maybe the layout isn’t quite right.
Fear not! Here’s a simple guide to tailor Sage 100 lookups to your needs, making them faster for you and more user-friendly.
Step into Custom Lookup Views in Sage 100
Sometimes, you might find yourself scrolling through hundreds, maybe thousands, of records. Let’s change that. Here’s how you can customize your lookup to get to the information you want, quicker:
Step 1: Click the magnifying glass icon to open any lookup window, then hit the ‘Custom’ button to fire up the Lookup Customization Wizard.
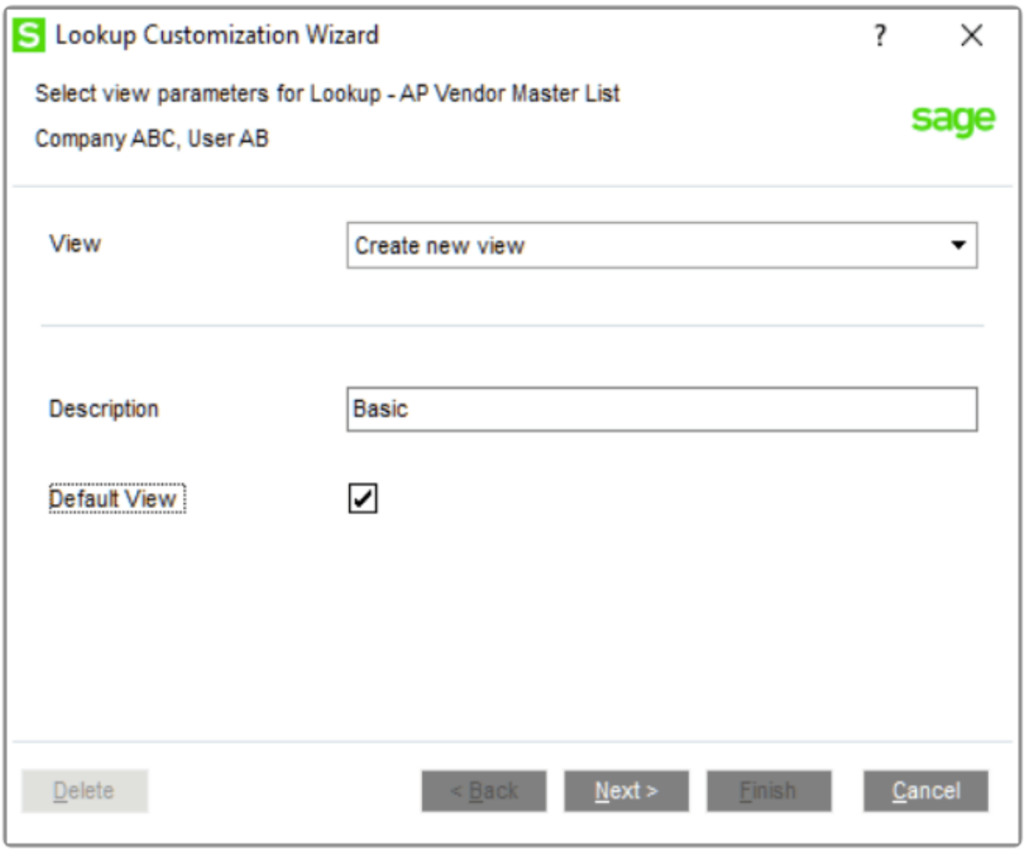
Step 2: Opt to ‘Create New View’ in the wizard, and name your view. Alternatively, tweak an existing one by selecting it from the list.
Step 3: Want this to be your default view? Tick the ‘Default View’ box before clicking ‘Next’.
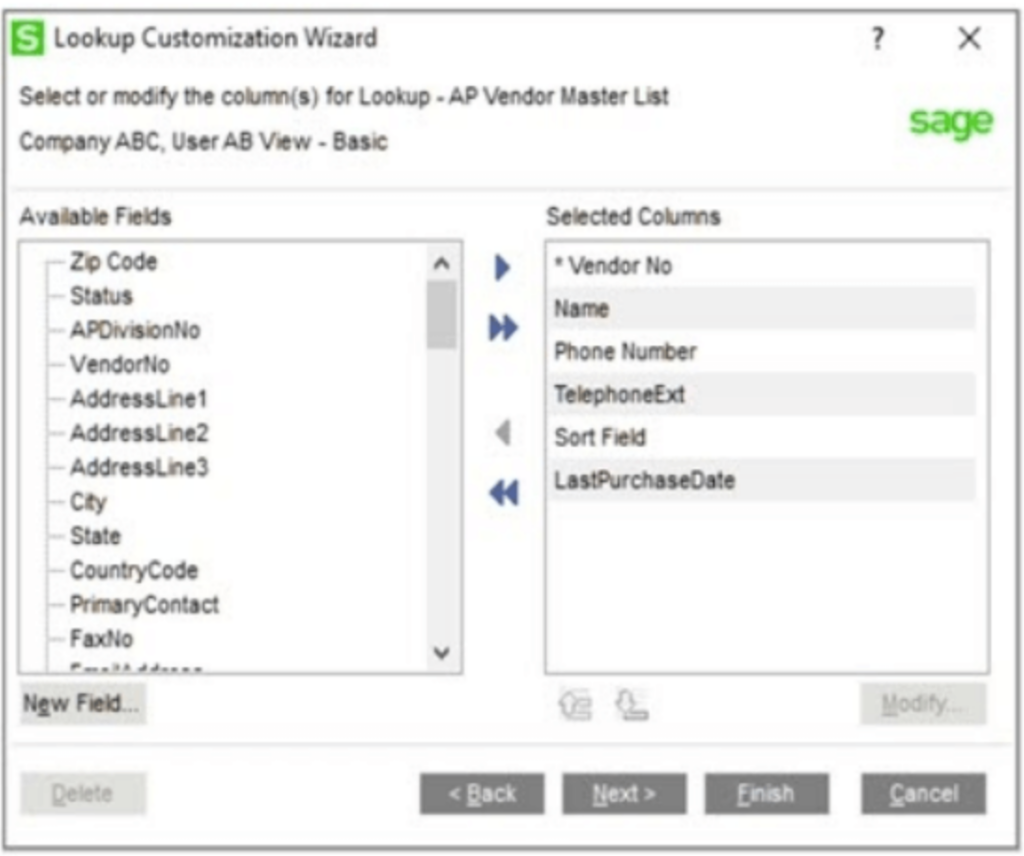
Step 4: Now the fun part! Add, delete, or rearrange columns. Remember, you can’t remove the first column (marked with an asterisk *), but you can change it up.
Step 5: Happy with the setup? Click ‘Finish’ or hit ‘Next’ to adjust more detailed settings like filters that refine what records show up.
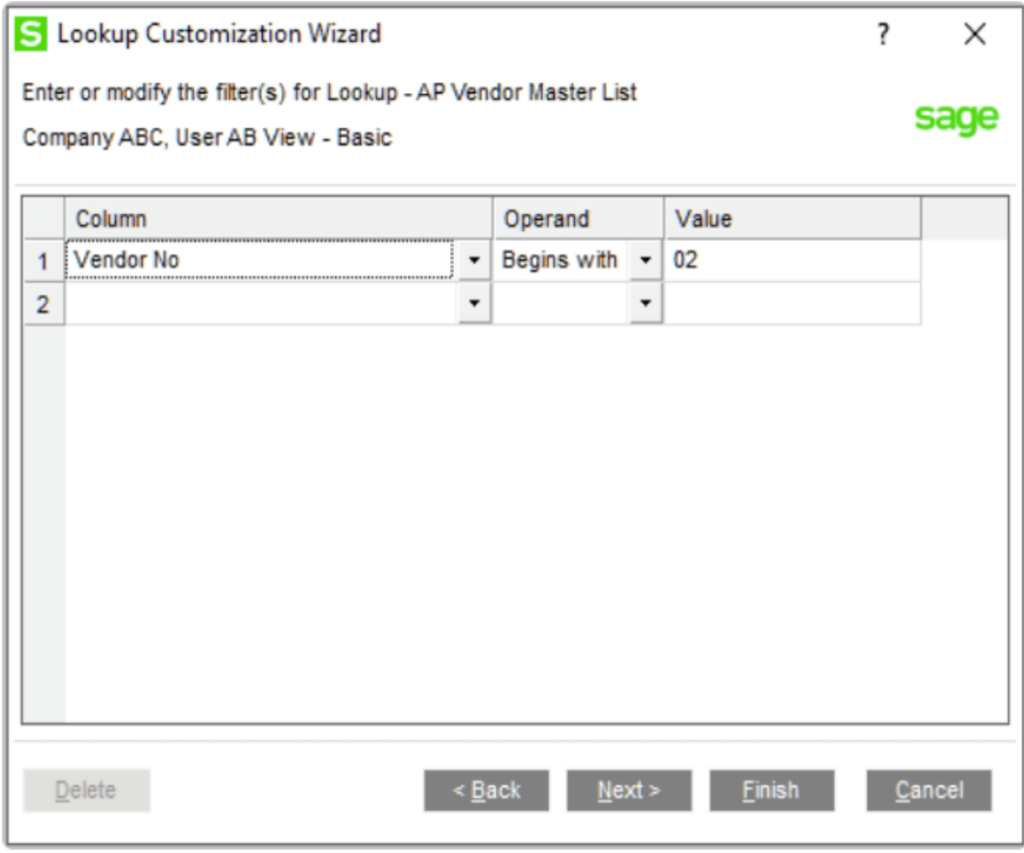
Step 6: If you went on to the next screen, here’s where you can fine-tune your filters. Add new ones, delete old ones, or alter existing ones to perfect your lookup view.
Step 7: All set? Make any last-minute adjustments and click ‘Finish’ to save your new custom lookup view.
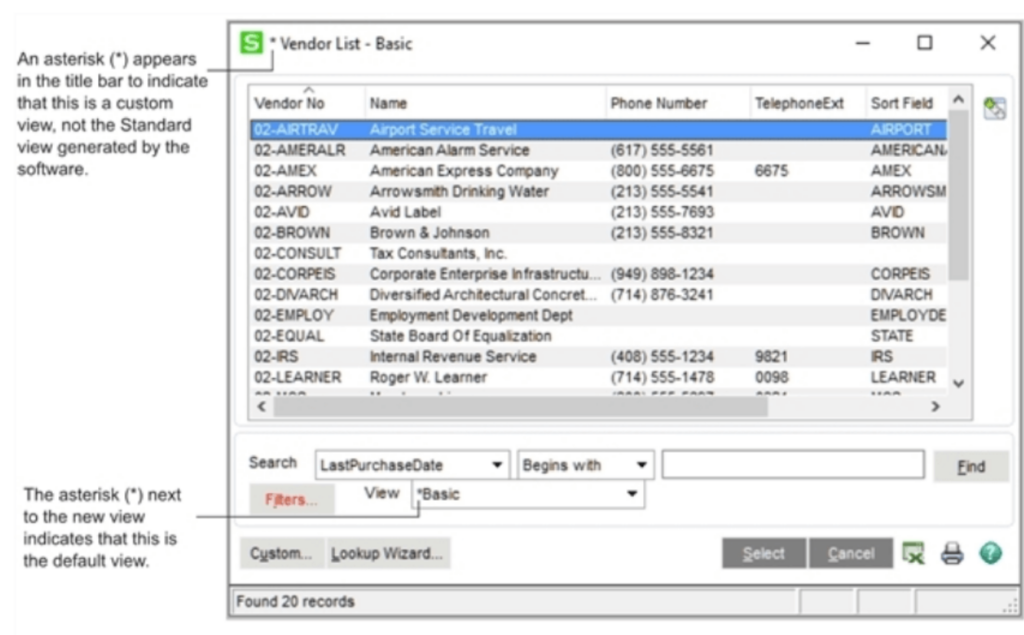
Now, when you open your lookup, it’ll proudly display your custom setup, making data retrieval a breeze!
Customizing lookups in Sage 100 doesn’t just save time; it makes your data work for you, letting you access and analyze it more efficiently than ever. Get ready to transform your data experience!
Bonus Sage 100 Tips:
Exporting Your Data: Easily export lookup data to Excel by clicking the Excel icon at the bottom right of the lookup window. This lets you analyze your data further outside Sage 100.
Modifying Existing Lookups: No need to always start from scratch. Modify an existing lookup to better meet your needs with just a few tweaks. On the second page of the Customization Wizard, choose ‘Modify’, make your changes, and you’re done!
Bennett/Porter is a leading Sage Partner with over 30 years of Accounting and ERP Software expertise and certifications. We have the knowledge, resources, and tenacity needed to support your business. Let our team of Sage consultants help you customize your financial data and make the reporting process faster and more efficient for your team. Get started today!